Overview
Reports are how your call data is presented to you in a visual, meaningful way. Although the results of each report type differ substantially, running each of them involves following a similar procedure. All report types accept filters and options, allowing you to tailor the results to exactly the information you are looking for.
The reports can be run on demand at any time, or be scheduled to run at predetermined times in the future.
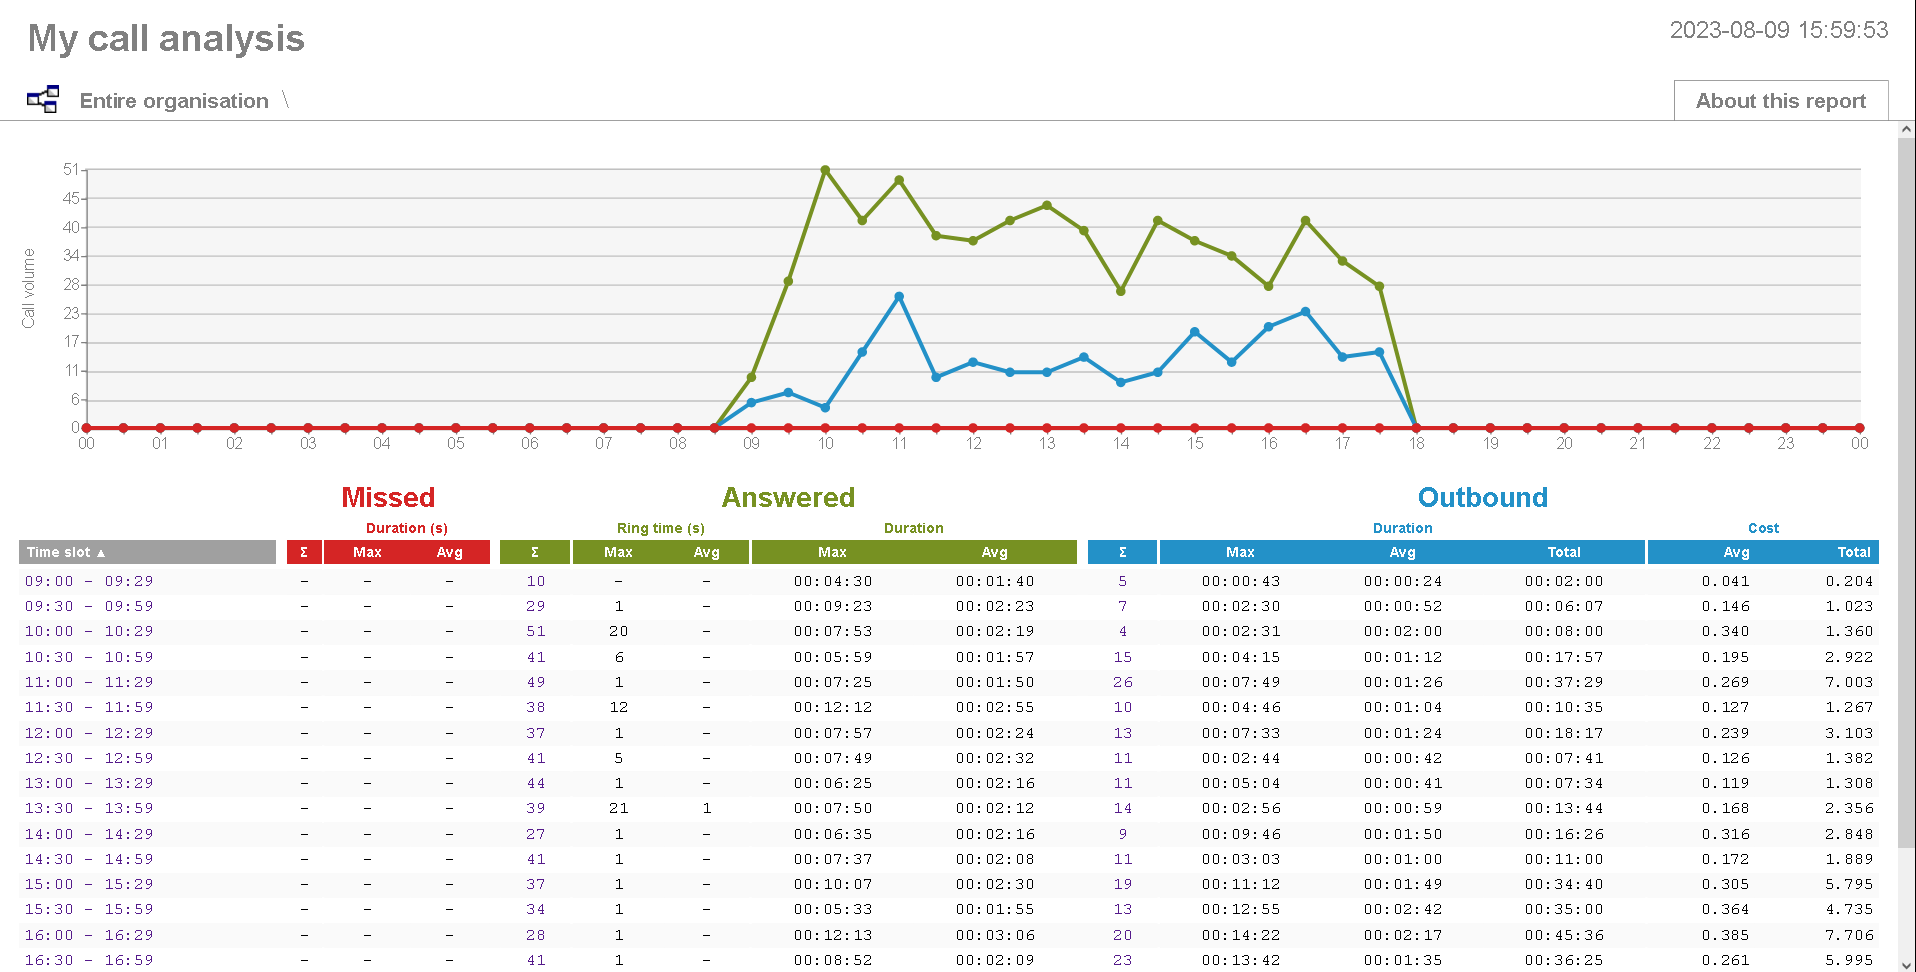
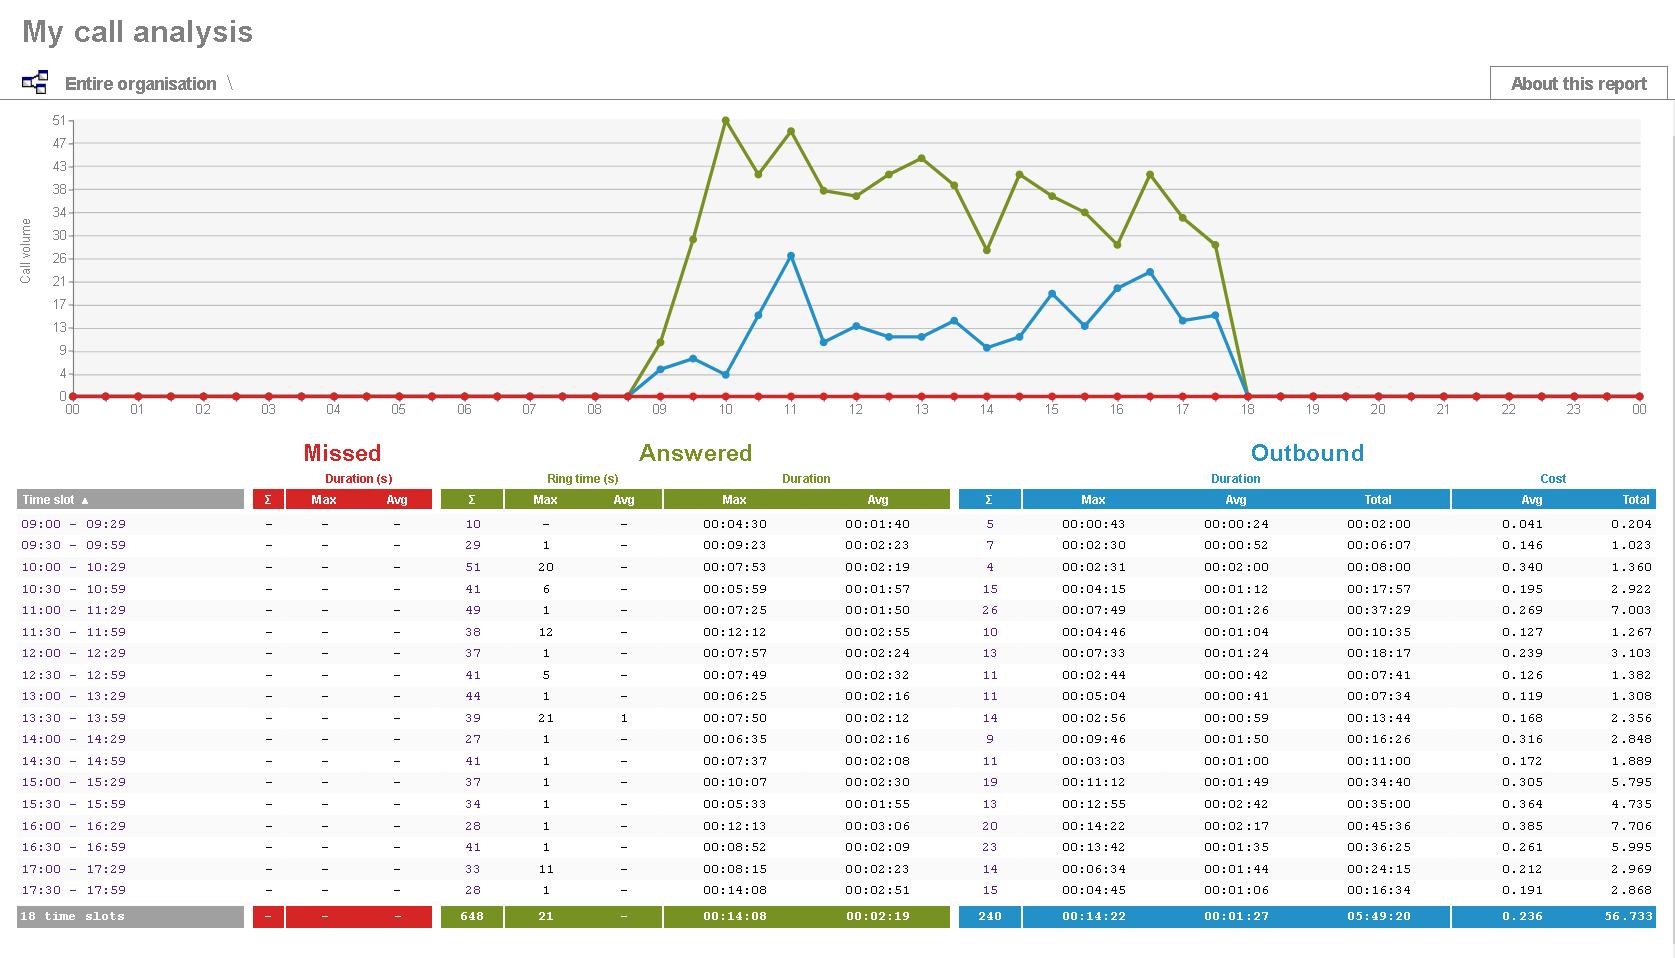
Below is an example output of the Call Analysis report:
Running reports on demand
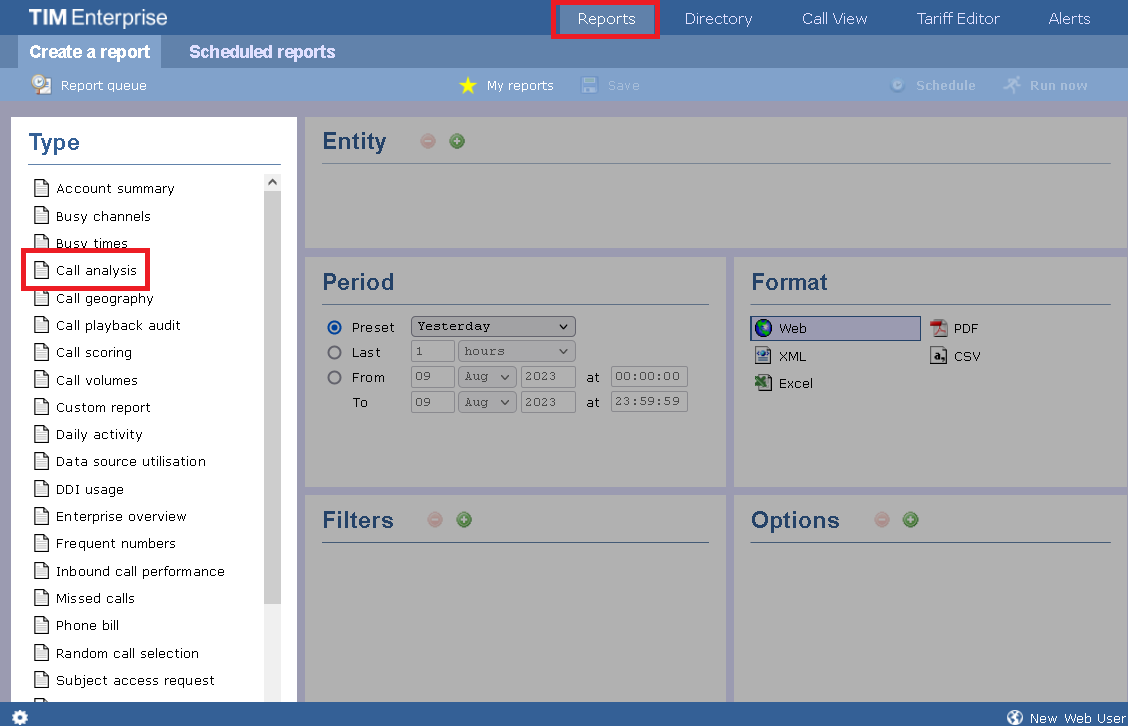
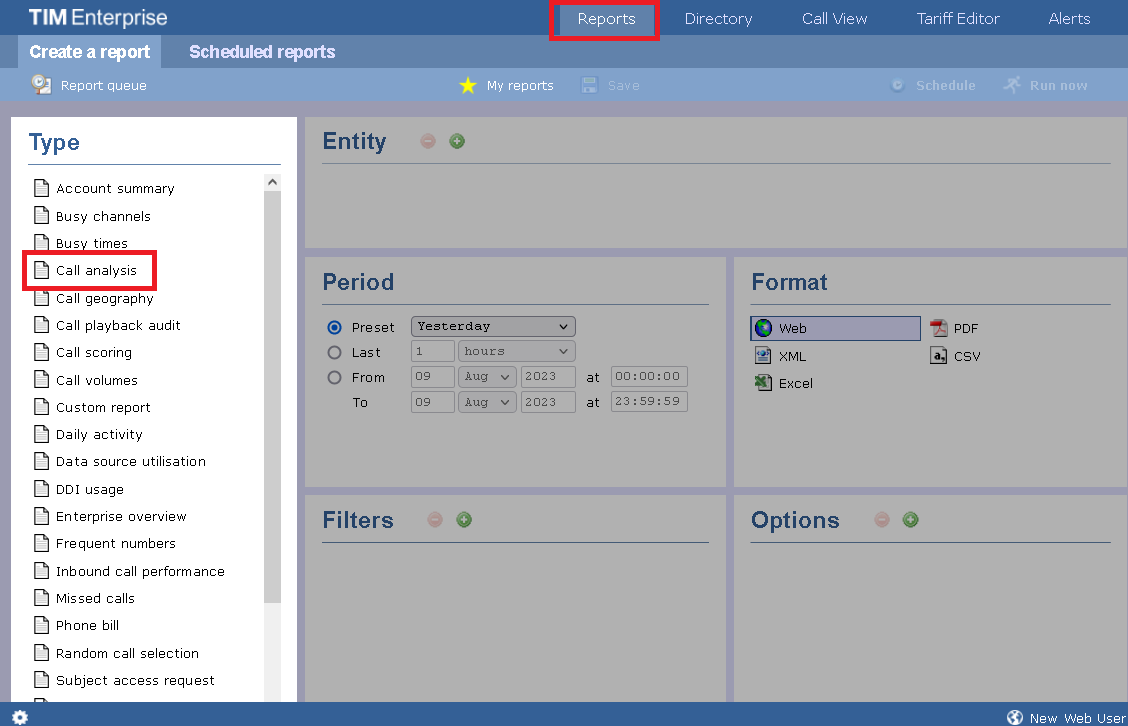
To run a report on demand, click on the Reports tab and select the report you want to run from the Type list on the left-hand side of the screen, as shown below:
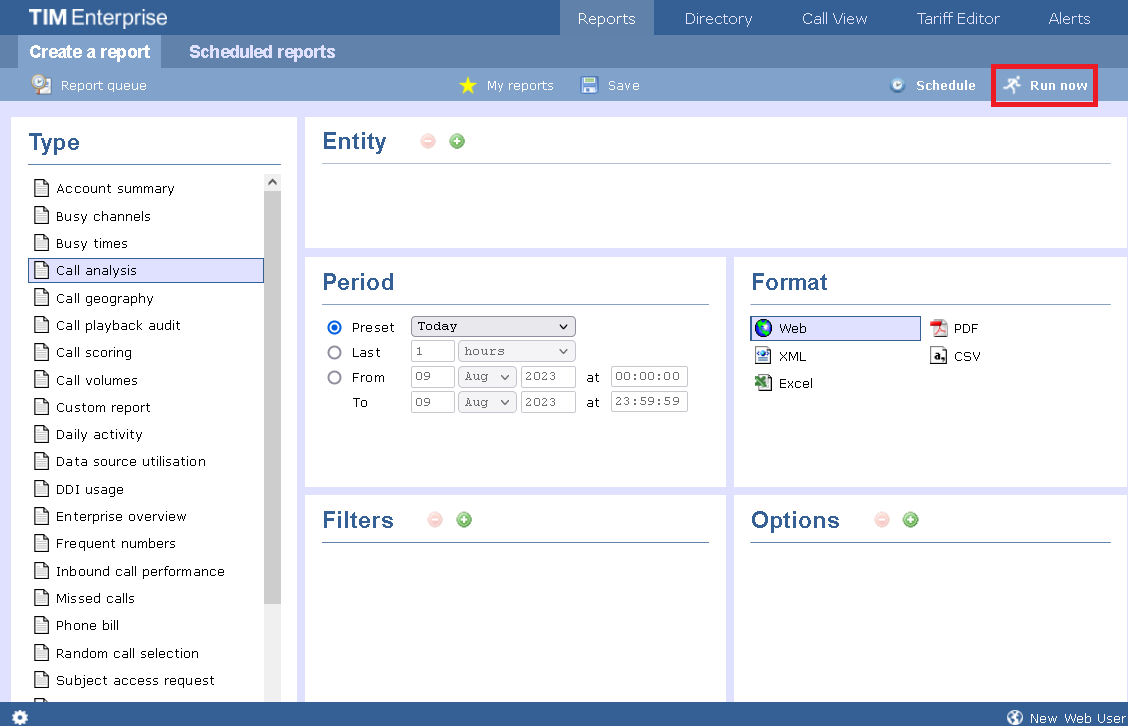
After selecting your report parameters, click the Run now button:
When the report has finished, its results will open in a new browser window.
The example below shows a Call Analysis report in Web format:
tip
If the results window does not appear after running your report, it may be because your browser is using a pop-up blocker. You should exclude pop-up blocking for the hostname of the computer running TIM Enterprise.
Scheduling reports
To schedule a report, click on the Reports tab and select the report you want to run from the available list on the left-hand side of the screen, as shown below:
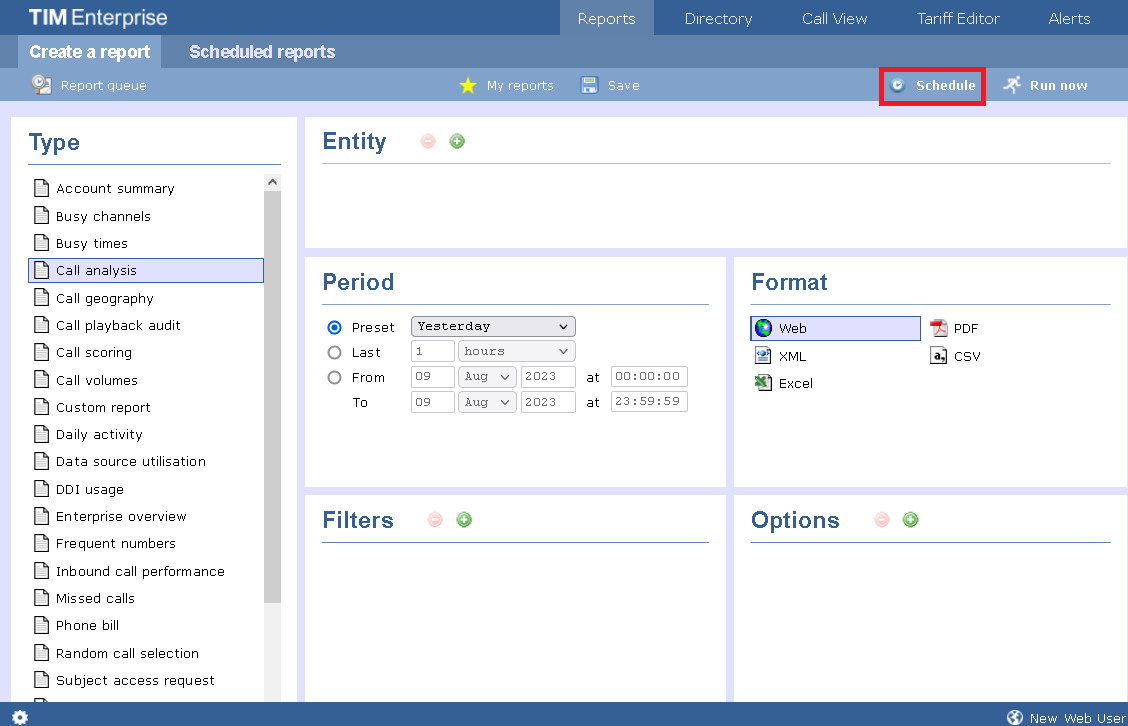
After selecting your report parameters, click on the Schedule button, as shown below:
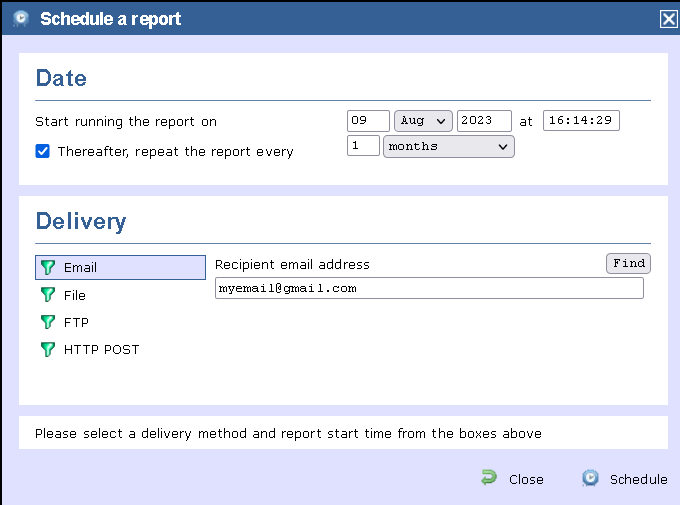
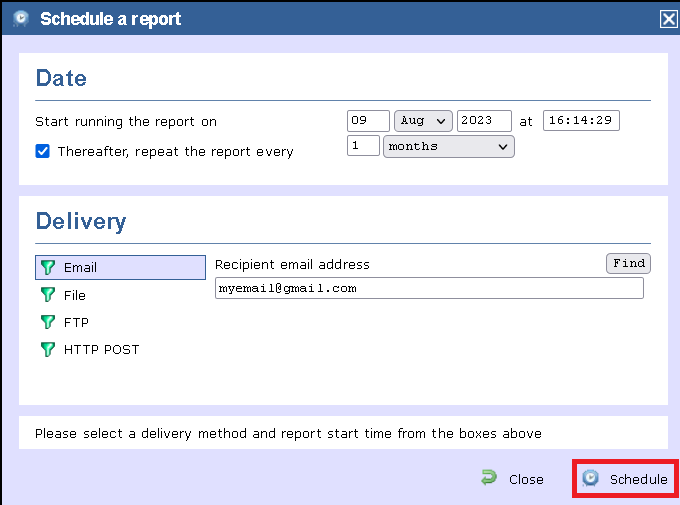
A new window will open, where you can set the scheduling parameters of the report:
- when you want the report to first run
- how frequently do you want the report to run
- how do you want the report delivered
- who should receive the report
Scheduling parameters
info
The properties of scheduled reports are web user-specific and can be seen or edited only by the web user that initially added the report to the system.
When do you want the first report to run?
Enter the future date and time that you want the report to run at, as shown below:
How often do you want the report to recur?
If you want the report to recur, tick the Thereafter, repeat the report box and select the frequency for re-runs from the drop-down list, as shown below:
How do you want the report delivered?
Select the method by which you want your report to be delivered and enter the destination parameters, as explained in the table below:
Choose a delivery method
The following methods can be used for the delivery of the scheduled report:
E-mail
Enter the e-mail address that you want the report to be delivered to. If you want the report to be e-mailed to more than one person, separate each address using the ; (semicolon) symbol.
File
Type the full filename, including the folder, of the location that you want the report to be saved, for example, C:\My Reports\My Call Analysis.html`
The filename can include the following variables:
| Variable | Description |
|---|---|
{year} | The current year |
{month} | The current month |
{week} | The current week number |
{day} | The current day of the month |
{hhmmss} | The time that the report ran, in a compact hours, minutes and seconds format |
{name} | The name given to the report |
{uiv} | A unique numeric report identifier |
To save the report to a network share, specify the filename using a UNC path. You must ensure that the user account running the TIM Enterprise service has access privileges to write to the file you have specified.
FTP
To send the scheduled report by FTP, enter the following parameters:
| Field | Description |
|---|---|
Host IP : port | The IP address or host name of the FTP server and, optionally, a port number |
Remote folder | The name of the remote folder where you want the report to be saved. |
Username | The username required to connect to the FTP server. |
Password | The password required to connect to the FTP server. |
HTTP POST
You can have your scheduled report posted by HTTP to a remote server by completing the following parameters:
| Field | Description |
|---|---|
Host IP : port | The IP address or host name of the remote web server |
Remote script | The name of the script that will handle the POST |
Username | A username for basic authentication, if required |
Password | A password for basic authentication, if required |
When you have configured the scheduling parameters, click on the Schedule button to save the report's definition.
The newly-scheduled reports will then be added to the Scheduled reports list, as shown below:

Editing scheduled report definition
To edit the definition of a scheduled report, select it from the Scheduled reports list and click on the Edit definition button, as shown below:

A new window will open, where you can edit the entity, period, filters, options and format of the report.
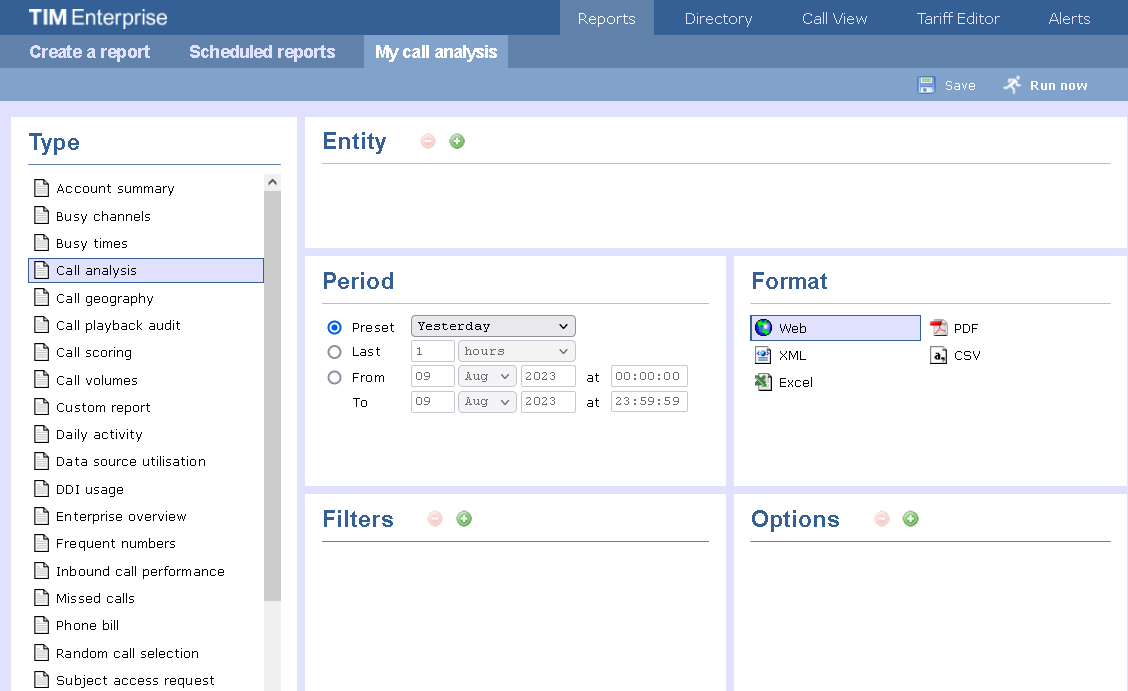
After making any changes to these report parameters, click on the Save button.
Editing scheduled report delivery
To edit the delivery of a report, select it from the Scheduled reports list and click on the Edit delivery button, as shown below:

A new window will open, allowing you to edit the scheduling parameters of the report. For details about how to configure these parameters, refer to the Scheduling parameters section above.
If you make any changes, ensure you press the Schedule button.
Suspending a scheduled report
To temporarily suspend the delivery of a report, select it from the Scheduled reports list and click on the icon, as shown below:

The icon will change to
, highlighting the report is suspended, as shown below:

Suspending all reports
To suspend all of your scheduled reports, click on the Suspend all button at the top-right of the Scheduled reports list.
Resuming a suspended report
To resume running a suspended report, click on the icon, as shown below:

Deleting a scheduled report
To delete a scheduled report, select it from the Scheduled reports list and click on the Delete schedule button at the top-left of the list, as shown below:

Click on the confirmation when prompted.
Saving a report
To save the definition of a complex report that you may need to re-run at a later time, configure its parameters and click on the Save button at the top-centre of the screen, as shown below:
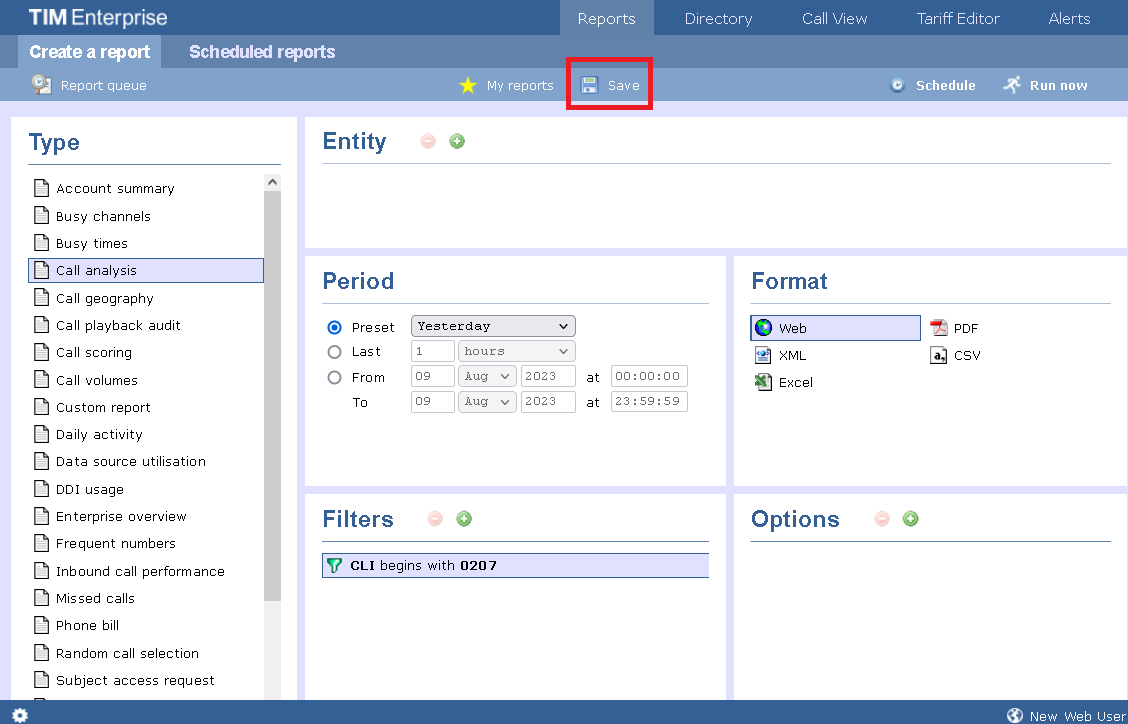
When the new window appears, prompting you to name the report's definition, enter a name and press the Save button.
Loading a saved report
To load a previously-saved report, click on the My reports button at the top centre of the screen, as shown below:
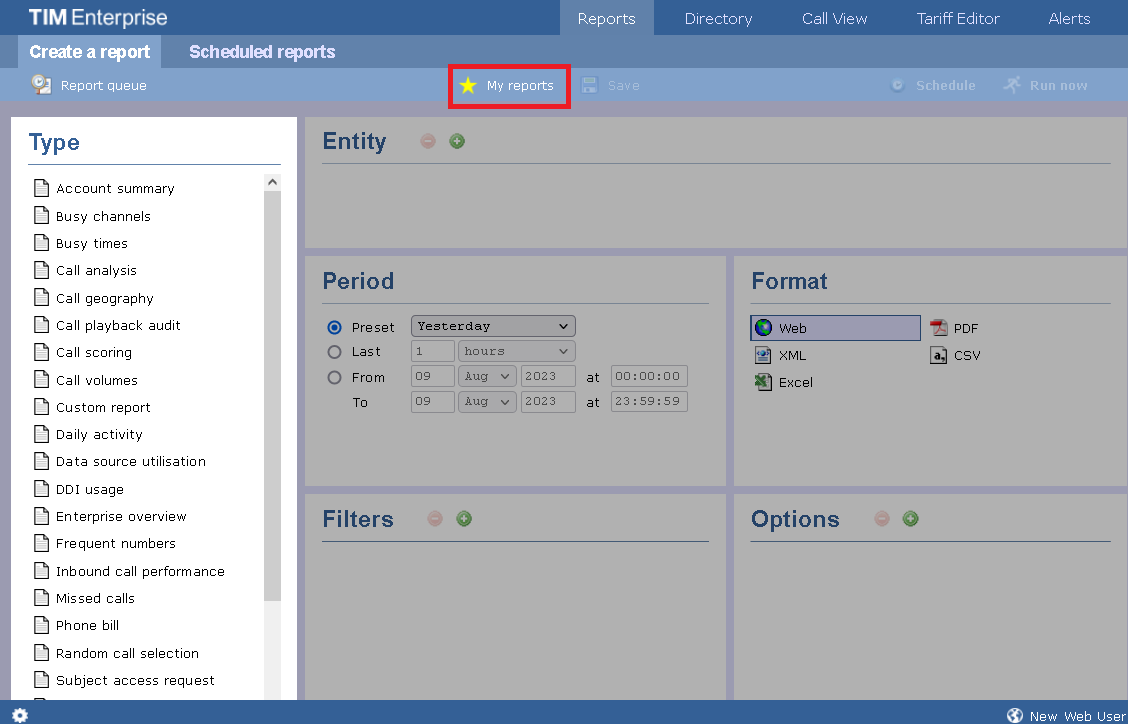
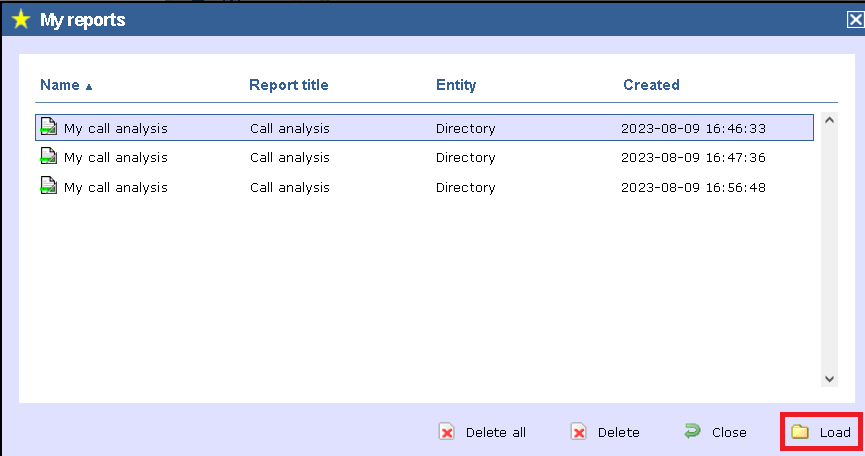
A new window will open, showing a list of all the reports previously saved in the system. To run or edit the properties of a report, select it from the list and click the Load button, as shown below:
Deleting a saved report
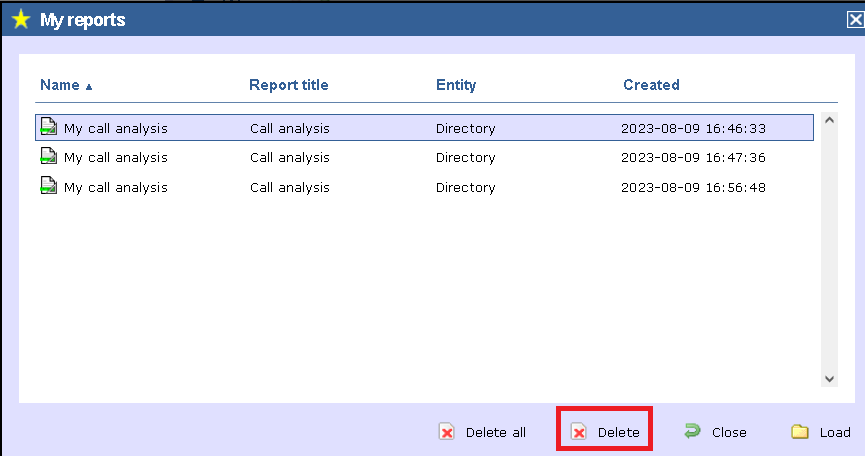
To delete a saved report, select it from the My reports list and click on the Delete button, as shown below:
